
DIY Branch Art Headboard
I'm sharing a fun, decorative DIY wall hanging with you today. I use this branch art as an alternative to a headboard above our bed, to add dimension and interest to the wall space, but it'd make a great statement piece anywhere in you home!

We've lived in our current apartment for almost two years and we love it for it's location and bright natural light. It is technically a studio apartment, meaning our bedroom space is an open loft above the main living area. I love how open that layout makes everything feel, but it has been a bit difficult to decorate! This space above our bed was left empty for over a year after moving in because I was so unsure of what to hang here with the sloped ceiling. I eventually decided a piece made from branches would be a nice, natural touch. This branch art I created was a great way to fill the space and balance it with the rest of the room, with out feeling heavy.
I was originally inspired by this triptych style birch branch wall hanging, but was wanting something simpler and single paneled. I was confident I could create something similar by myself and size it just right to fit the small wall space above our bed. See just how I created this piece below!


Supplies Needed
1. branches
2. pruning shears
3. measuring tape
4. 1in x 2in boards
5. sandpaper
6. white acrylic paint
7. paint brushes
8. hot glue gun & glue sticks
9. nails
directions
1. If you know where you'll be hanging your finished piece, measure the area so you know exactly what to cut your boards that will make up the frame to. I cut mine to the exact width of our queen-sized bed, which is 54 inches. I cut the other two sides to 16 inches, meaning I only needed two 1 in x 2 in by 8 ft spruce boards for the project. Most hardware stores will cut for you, or have an area for you to do it yourself! Sand down any rough edges.
2. Once you have the beams cut to size and have sanded any rough spots, you'll want to white-wash them. White-washing will create a nice bright, clean look, while still allowing the woodgrain to show through. Mix a one-one ratio of white acrylic paint and water. Paint all sides of the boards. Let dry.
3. Nail the frame boards together. If needed, have someone help you hold and stabilize the frame as you secure each corner.
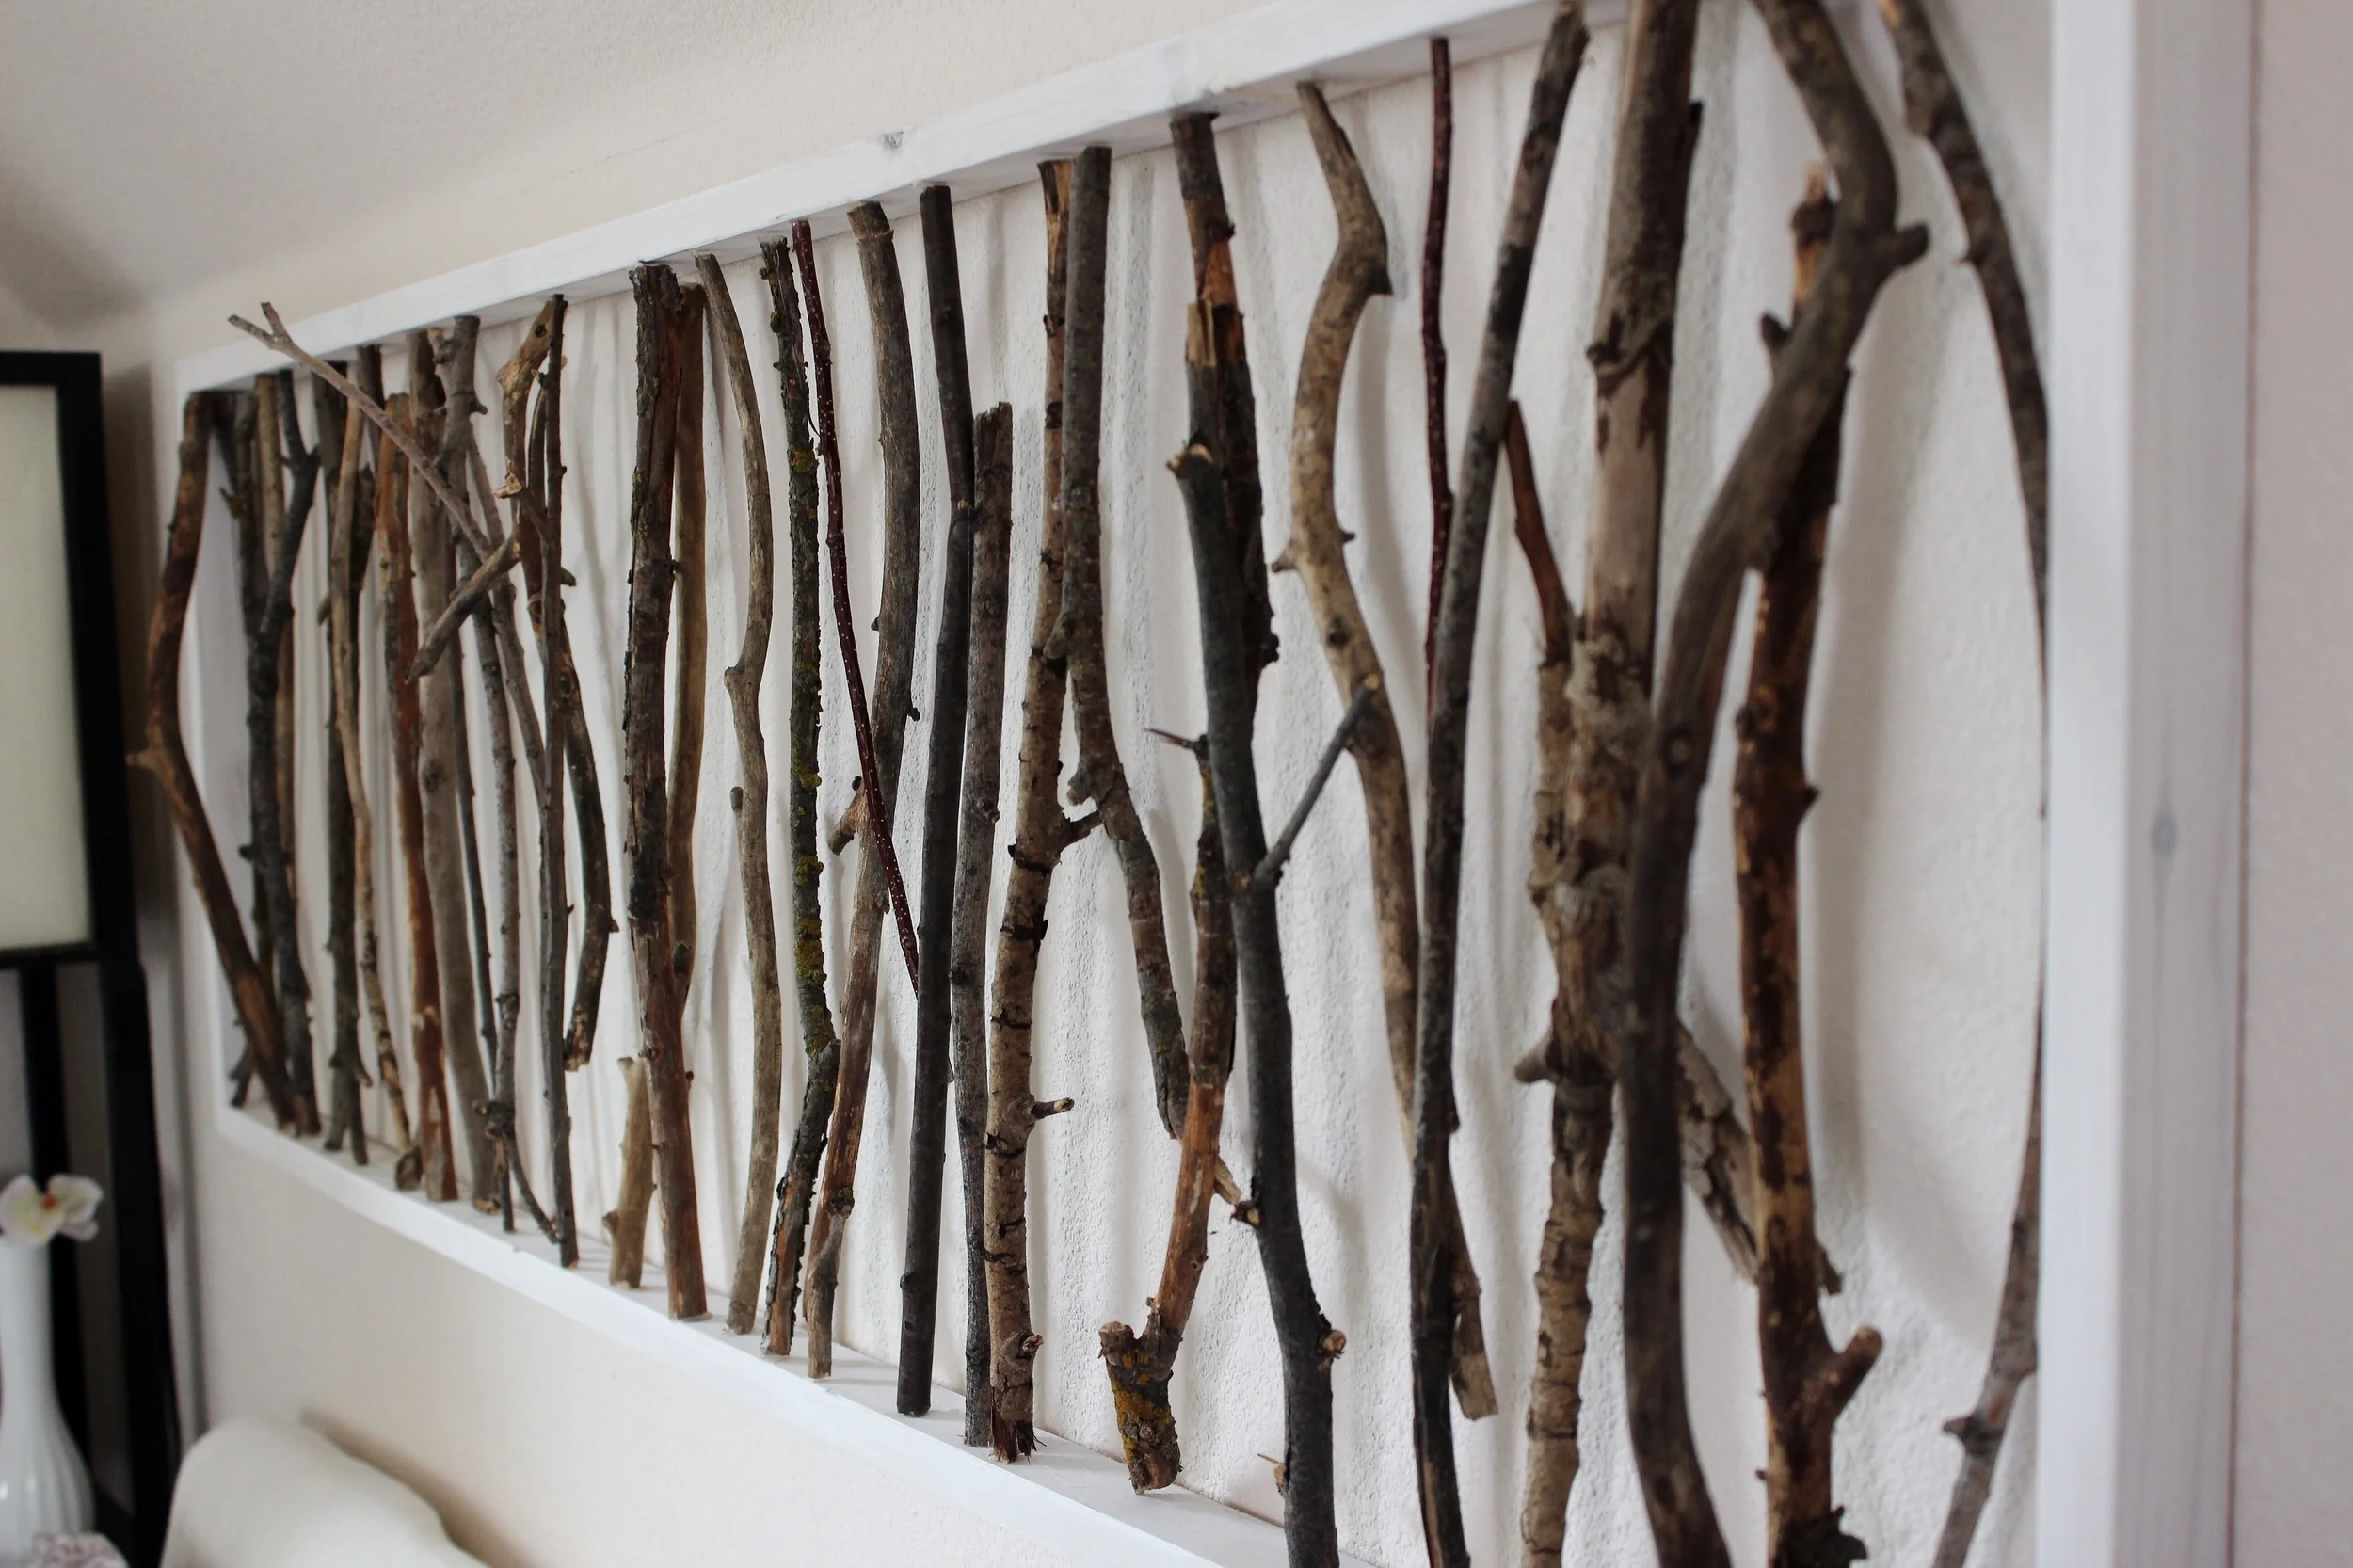
4. Once, your frame is built, it's time to cut all of your branches to fit! I collected my branches by walking around a trail and creek near my home and grabbing fallen branches of various sizes and colors.
5. Adhere each branch to both sides of the inside of the frame using a fair amount of hot glue.
6. Allow the glue to set and clean up any stray hot glue strings. You're ready to hang the finished piece!

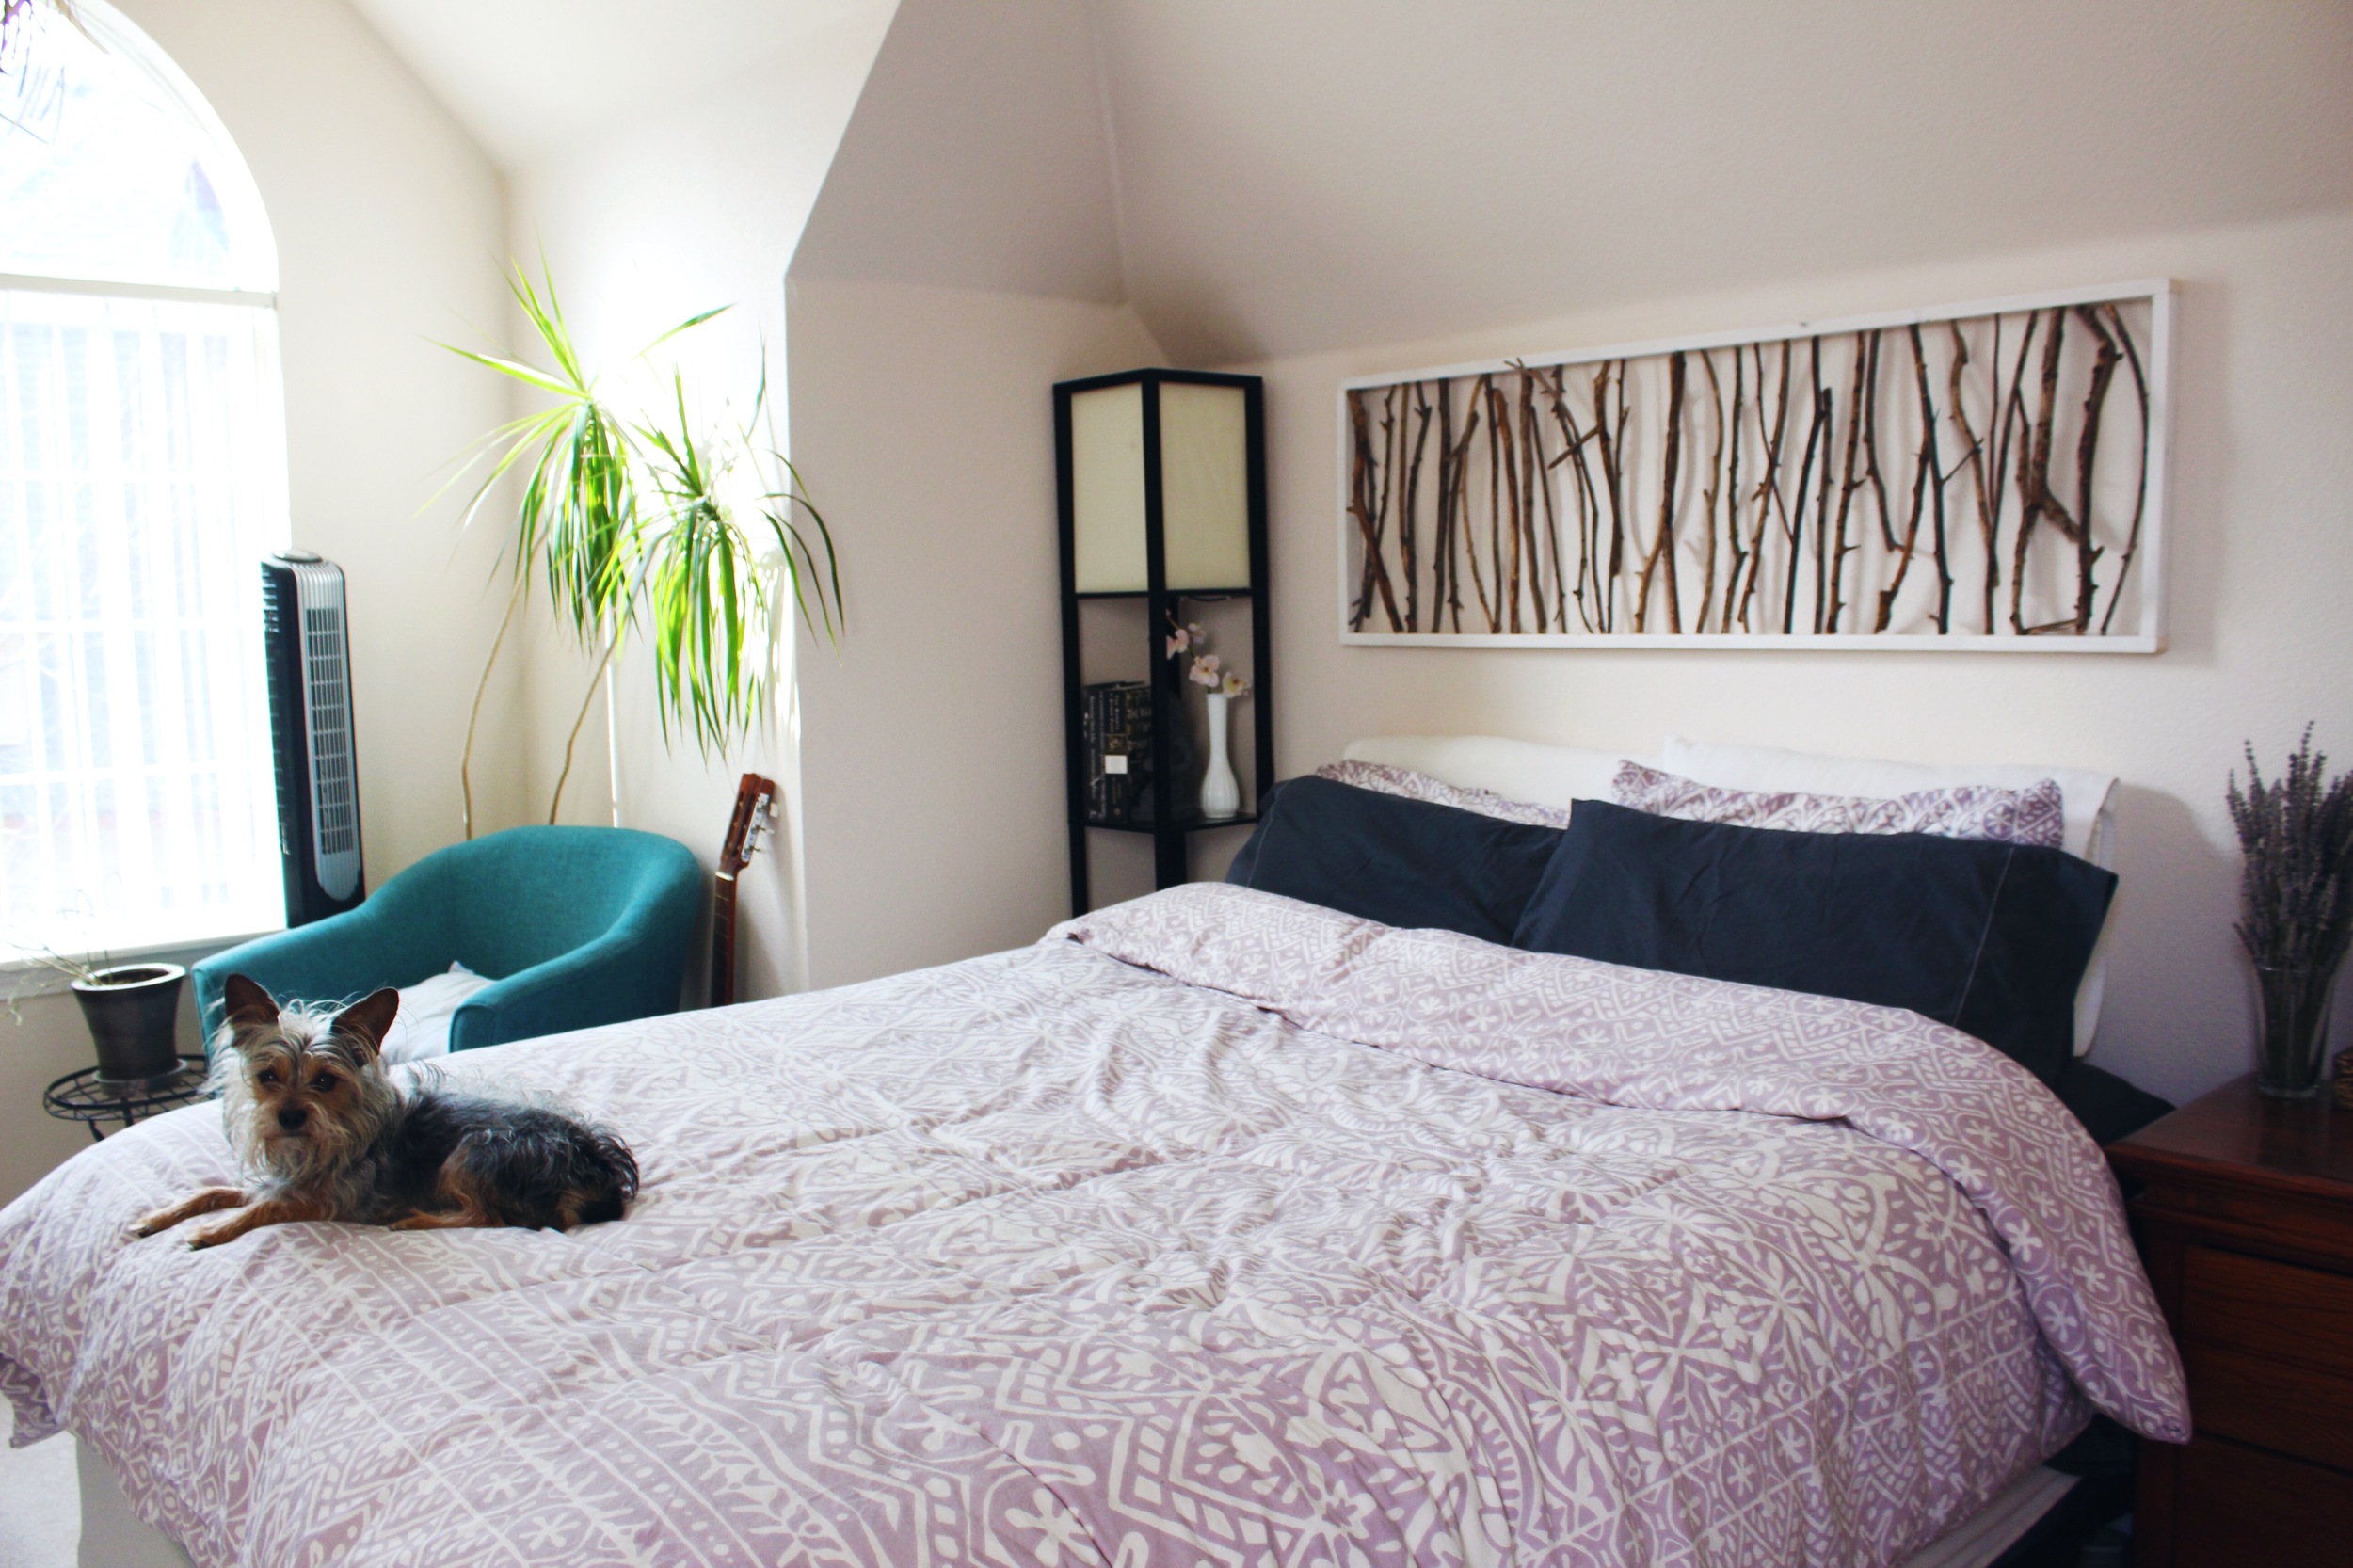
Pippin approved!